Building a Timer with React ⏱
Building the UI and Starter Logic of Our DevTimer


Before We Dig In 🤔
I thought it might be helpful to give a bit more explanation as to why I am working on this project and what the goal is exactly. When it comes to developing photographic film, there is usually a recipe depending on what you're processing. For instance, if you are developing color negative film using the standard C-41 chemicals, its a pretty cut and dry recipe. It would look something like this:
- Pre-Soak (1:00)
- Developer (4:30)
- Blix (6:00)
- Wash (3:00)
- Stabilizer (1:00)
This is pretty much the same for all C-41 processed films, but black and white film has a lot more variables to play with that will give you different results. A great place to see these would be FilmDev.org, a registry with thousands of people's recipes for developing black and white film.
One of the most cumbersome parts of the film developing process is keeping track of the minutes for each stage. Typically I use my iPhone timer, but I have to keep stopping it, changing the time, starting it again, etc. The goal of this app would be to help film photographers input their desired intervals, and just hit start. That way they can focus on the actual chemical process! Hope that help gives a bit of context and vision for where this should go.
Building the UI 🤳
To start building the UI we want to begin with a simple step, so for this entry we'll build just the Timer page and components, as referenced in our design from earlier.
For the styles of this project I'll be using styled components, which I absolutely love because the methodology matches the main concept of React. First we want to start with some global styles that determine the colors, font faces, and sizes. This step is a breeze since most of this came straight from Figma in the last entry.
import { createGlobalStyle } from "styled-components";

const GlobalStyles = createGlobalStyle`

  *{
    margin: 0;
    padding: 0;
    box-sizing: border-box;
  }

  body {
    width: 100%;
    font-family: 'Source Sans Pro', sans-serif;
    background: #3f444a;
    color: #f1ebdc;
  }

  h1 {
    font-size: 64px;
  }
  h2 {
    font-size: 50px;
  }
  h3 {
    font-size: 38px;
  }
  h4 {
    font-size: 28px;
  }
  h5 {
    font-size: 21px;
  }
  p {
    font-size: 16px;
  }
`;

export default GlobalStyles;
Next we want to knock out the annoying burger menu in the top right hand corner. We'll make each line a separate div so we can animate them later when toggling the menu.
import React from "react";
import styled from "styled-components";

const Burger = () => {
  return (
    <BurgerContainer>
      <Line1 />
      <Line2 />
      <Line3 />
    </BurgerContainer>
  );
};

const BurgerContainer = styled.div`
  display: flex;
  flex-direction: column;
  justify-content: space-between;
  width: 40px;
  height: 25px;
  position: absolute;
  top: 5%;
  right: 10%;
  pointer: cursor;
`;

const Line1 = styled.div`
  width: 40px;
  height: 2px;
  background: #cfbba3;
`;

const Line2 = styled.div`
  width: 40px;
  height: 2px;
  background: #cfbba3;
`;

const Line3 = styled.div`
  width: 40px;
  height: 2px;
  background: #cfbba3;
`;

export default Burger;
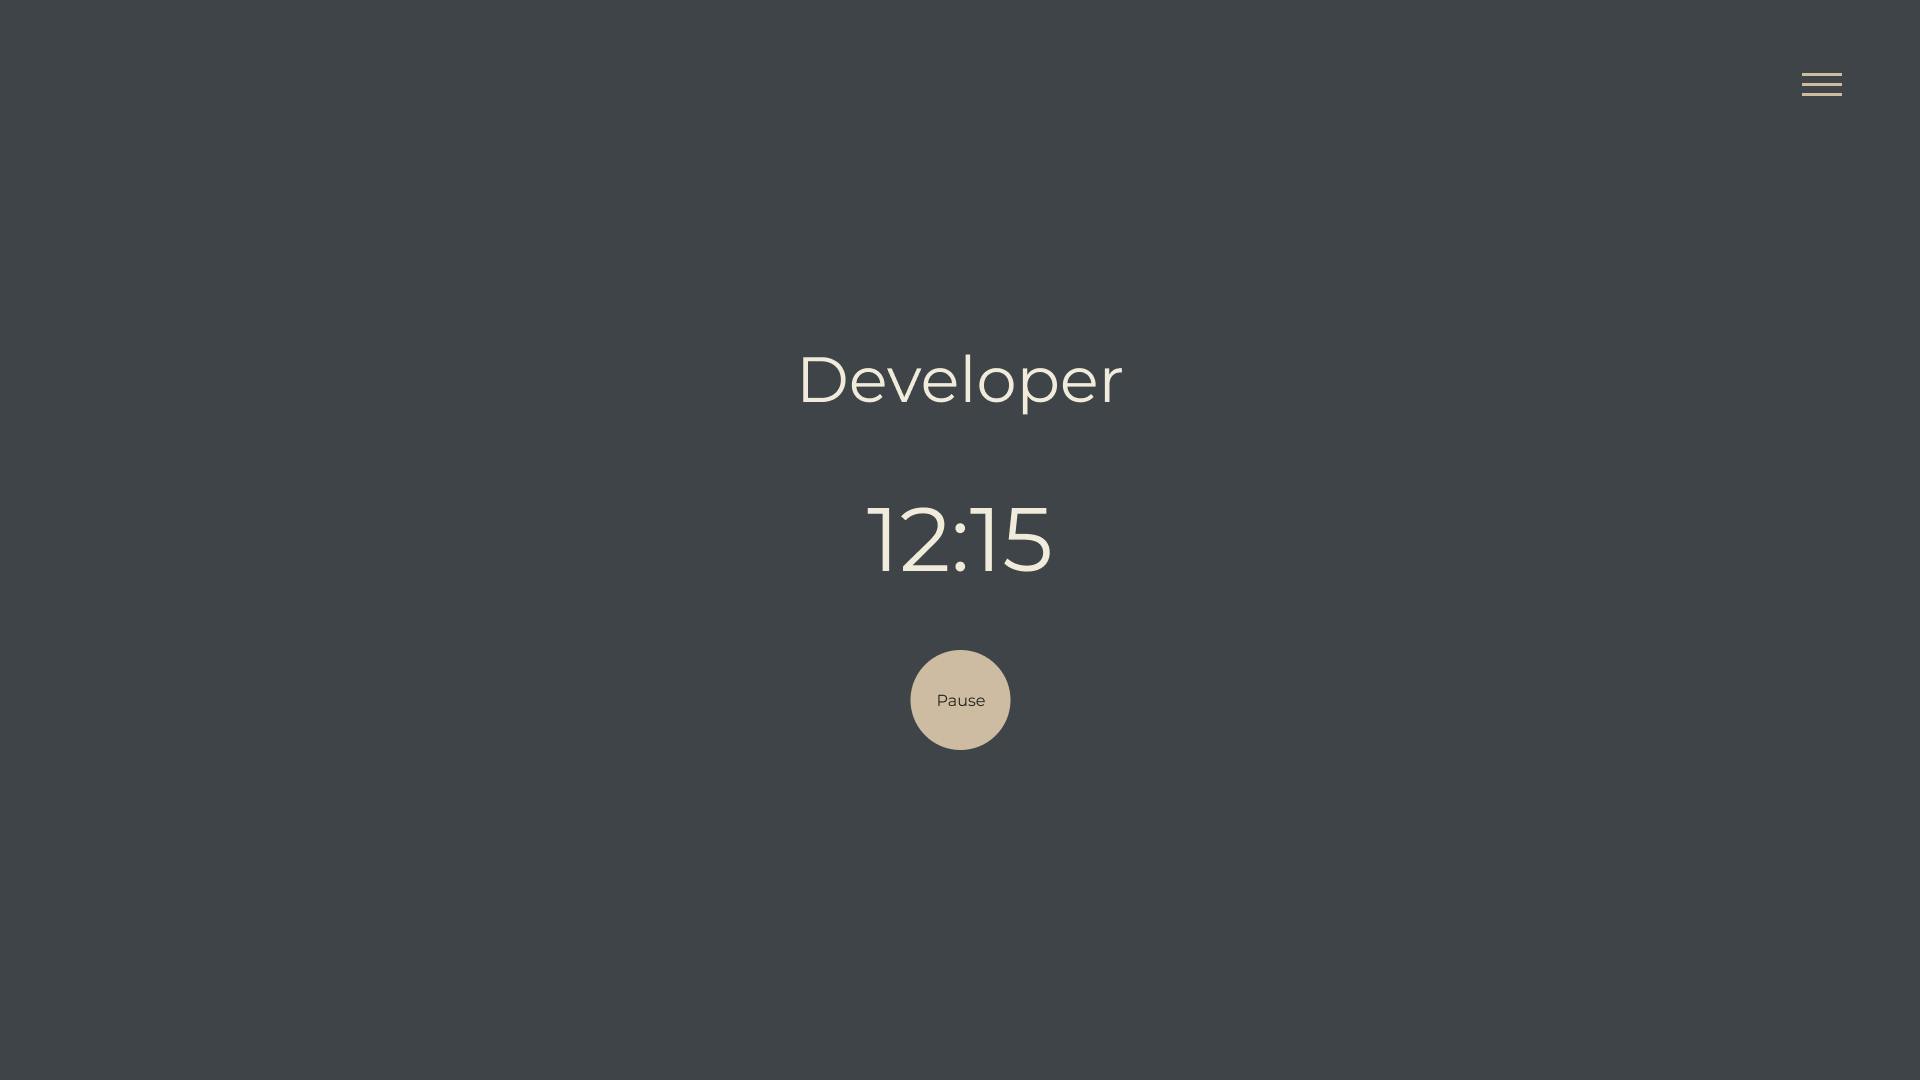
That leaves us with the following so far:

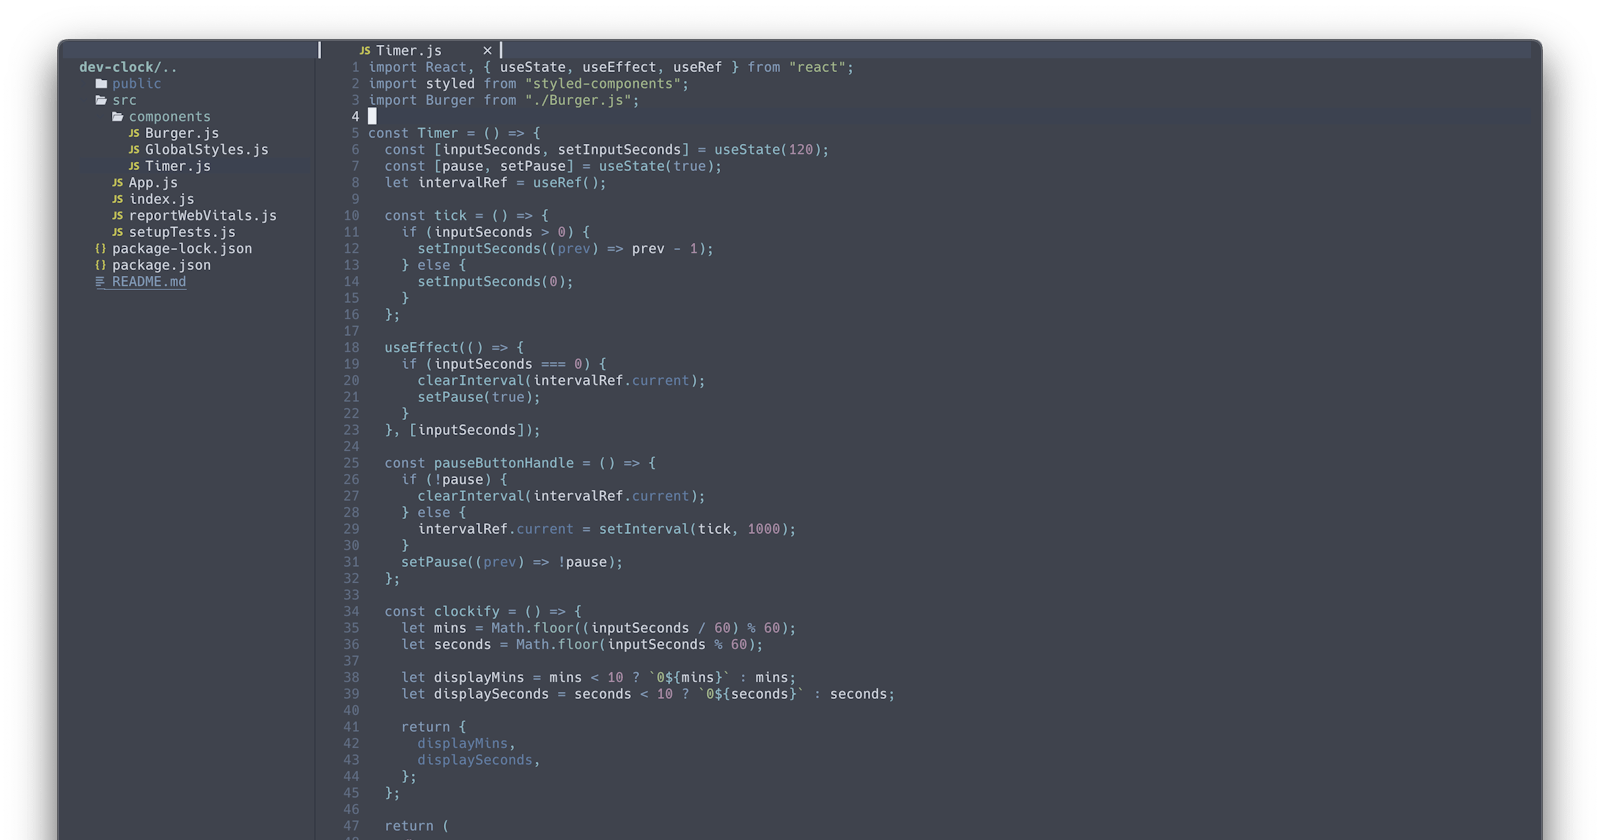
Now we create a pretty simple div with the header of the stage we are in, the time remaining, and a button.
import React, { useState, useEffect, useRef } from "react";
import styled from "styled-components";
import Burger from "./Burger.js";

const Timer = () => {
  return (
    <>
      <Burger />
      <ClockContainer>
        <Clock>
          <h1>Developer</h1>
          <h2>
            12:30
          </h2>
          <PauseButton>Pause</PauseButton>
        </Clock>
      </ClockContainer>
    </>
  );
};

const Clock = styled.div`
  height: 50vh;
  width: 20rem;
  display: flex;
  flex-direction: column;
  justify-content: space-between;
  align-items: center;
  h2 {
    font-size: 90px;
  }
`;

const ClockContainer = styled.div`
  height: 100vh;
  width: 100%;
  display: flex;
  justify-content: center;
  align-items: center;
`;

const PauseButton = styled.button`
  border: none;
  width: 80px;
  height: 80px;
  border-radius: 50%;
  background: #cfbba3;
  cursor: pointer;
  color: #3f444a;
`;

export default Timer;
That's about it for the UI; now onto the logic!
Building the Timer Logic 👨🏻💻
I know a lot of people hate working with CSS, but for me that's the easy part. Figuring out the logic to make this clock tick was definitely the harder part of this first step. I did some googling to see how other people have made a simple timer in JS or React, and it was a little bit tricky because I had a few things I knew I needed in this initial timer. The first thing would be hooks, particularly useState() to store the number of minutes the timer would run, and the ability to pass it through props in other parts of the application. Another thing I looked for was how to process the minute and second variables, and all the weird math that would have to happen in order to make sure 2:00 turns into 1:59; proved to be harder than I expected. I found several examples other people have made it kind of created a mesh of different methods that fit my needs.
First thing we need to do is establish the state for our input seconds, as well as state for if the timer is pause or not. One other hook I imported here was useRef() which we'll get into later. I set the initial time to be 120 seconds, and the timer to be paused when loaded.
 const [inputSeconds, setInputSeconds] = useState(120);
 const [pause, setPause] = useState(true);
 let intervalRef = useRef();
The next thing we want to do is start the timer! We'll do this with a very simple function called tick() that will take our state (inputSeconds(120)) and set it to whatever it was previously, then subtract it by 1.
const tick = () => {setInputSeconds((prev) => prev - 1)};
Now we want to create a function that will let us start and stop the timer by pressing the button, which we'll call pauseButtonHandle(). Now is the time to use our useRef() hook that we created earlier. This hook per the documentation "is like a 'box' that can hold a mutable value in its .current property." It creates a Javascript reference object, which is similar to useState(), however this time when we change it's value, it will not re-render the component all over again. We'll use this hook with another Javascript method called setInterval() along with clearInterval(). These methods simply let us call a function every number of milliseconds, and stop that function from running respectively. So our pauseButtonHandle() function looks like the following: if our pause state is true, then we want to run clearInterval() to prevent our tick function from running, but also store our previous useRef() variable intervalRef (how many seconds we had left). Otherwise, if pause is set to false, then we want to take our left over second, and run it through our tick function every 1000 milliseconds, aka once per second. Therefore we're taking our 120 initial seconds and subtracting 1 every second. Also we want to update our pause state every time we click on it, which we do after the if/else statement. Its crazy that React can do so much with so little code!
  const pauseButtonHandle = () => {
    if (!pause) {
      clearInterval(intervalRef.current);
    } else {
      intervalRef.current = setInterval(tick, 1000);
    }
    setPause((prev) => !pause);
  };
Another thing we want to implement is to make sure the timer stops when it reaches zero. I first tried this by use an if(inputSeconds > 0) statement, but unfortunately that did not work. It took me a while to figure out that it wouldn't work because Javascript is a single threaded programming language, and the way I was using state and setting it would not reload the state for the if statement to work. A solution I found was to implement useEffect() which lets us tell React to do something even after the component is rendered. We'll call use effect and run our if statement there. If our state of inputSeconds = 0, then we want to clearInterval(intervalRef.current) to stop our tick function, and we want to change our pause state to true.
  useEffect(() => {
    if (inputSeconds === 0) {
      clearInterval(intervalRef.current);
      setPause(true);
    }
  }, [inputSeconds]);
We're getting close to a fully working timer, but the last function we need to write is one that will parse our seconds and render it as minutes and seconds. I found a great function someone else created in a similar project that I modified to fit our purposes here. The first thing we'll do is establish some variables: mins and seconds. To determine these we take our inputSeconds state and divide it by 60, then run it through a remainder operator, and finally use Math.floor() to make it an even number. Next we want to define displayMins and displaySeconds by taking our initial variables and running them through a simple ternary function; if mins is less than 10, then return 0(our variable), otherwise just return our variable. Finally we want to return these display variables at the end.
  const clockify = () => {
    let mins = Math.floor((inputSeconds / 60) % 60);
    let seconds = Math.floor(inputSeconds % 60);

    let displayMins = mins < 10 ? `0${mins}` : mins;
    let displaySeconds = seconds < 10 ? `0${seconds}` : seconds;

    return {
      displayMins,
      displaySeconds,
    };
Now we can display them in our H2 inside our Timer component by using curly braces, running the function we made called clockify() and accessing the results as an object: clockify().displayMins. Which ends up looking like this:
          <h2>
            {clockify().displayMins}:{clockify().displaySeconds}
          </h2>
Finally, we want to add our pauseButtonHandle() to our button, as well as a ternary function that determines whether we need to display "pause" or "start" based on the paused state.
          <PauseButton onClick={pauseButtonHandle}>
            {pause ? "Start" : "Pause"}
          </PauseButton>
And there you have it! Now we have a fully functioning timer that will start and pause by clicking on the button, and stopping after we reach zero. Here is our code for the Timer component right now:
import React, { useState, useEffect, useRef } from "react";
import styled from "styled-components";
import Burger from "./Burger.js";

const Timer = () => {
  const [inputSeconds, setInputSeconds] = useState(120);
  const [pause, setPause] = useState(true);
  let intervalRef = useRef();

  const tick = () => {setInputSeconds((prev) => prev - 1)};

  useEffect(() => {
    if (inputSeconds === 0) {
      clearInterval(intervalRef.current);
      setPause(true);
    }
  }, [inputSeconds]);

  const pauseButtonHandle = () => {
    if (!pause) {
      clearInterval(intervalRef.current);
    } else {
      intervalRef.current = setInterval(tick, 1000);
    }
    setPause((prev) => !pause);
  };

  const clockify = () => {
    let mins = Math.floor((inputSeconds / 60) % 60);
    let seconds = Math.floor(inputSeconds % 60);

    let displayMins = mins < 10 ? `0${mins}` : mins;
    let displaySeconds = seconds < 10 ? `0${seconds}` : seconds;

    return {
      displayMins,
      displaySeconds,
    };
  };

  return (
    <>
      <Burger />
      <ClockContainer>
        <Clock>
          <h1>Developer</h1>
          <h2>
            {clockify().displayMins}:{clockify().displaySeconds}
          </h2>
          <PauseButton onClick={pauseButtonHandle}>
            {pause ? "Start" : "Pause"}
          </PauseButton>
        </Clock>
      </ClockContainer>
    </>
  );
};

const Clock = styled.div`
  height: 50vh;
  width: 20rem;
  display: flex;
  flex-direction: column;
  justify-content: space-between;
  align-items: center;
  h2 {
    font-size: 90px;
  }
`;

const ClockContainer = styled.div`
  height: 100vh;
  width: 100%;
  display: flex;
  justify-content: center;
  align-items: center;
`;

const PauseButton = styled.button`
  border: none;
  width: 80px;
  height: 80px;
  border-radius: 50%;
  background: #cfbba3;
  cursor: pointer;
  color: #3f444a;
`;

export default Timer;
If you want to play with this timer I have the main branch of this repo hosted here!. You can also access the GitHub Repo here as well. In our next entry we will be looking into setting up Redux to help manage our state, since there will be many more variables for people to input rather than just inputSeconds, and we will want to keep it organized. Thanks if you made it this far and I hope to see you on the next one!
Steve